Deploying to Hardware
A major goal of Archimedes is to provide a “path to hardware” from Python. Importantly though, this does not mean “running Python on a microcontroller”. For a variety of reasons, this is often not a viable approach, especially for safety- and mission-critical systems that require precise and deterministic memory and timing management.
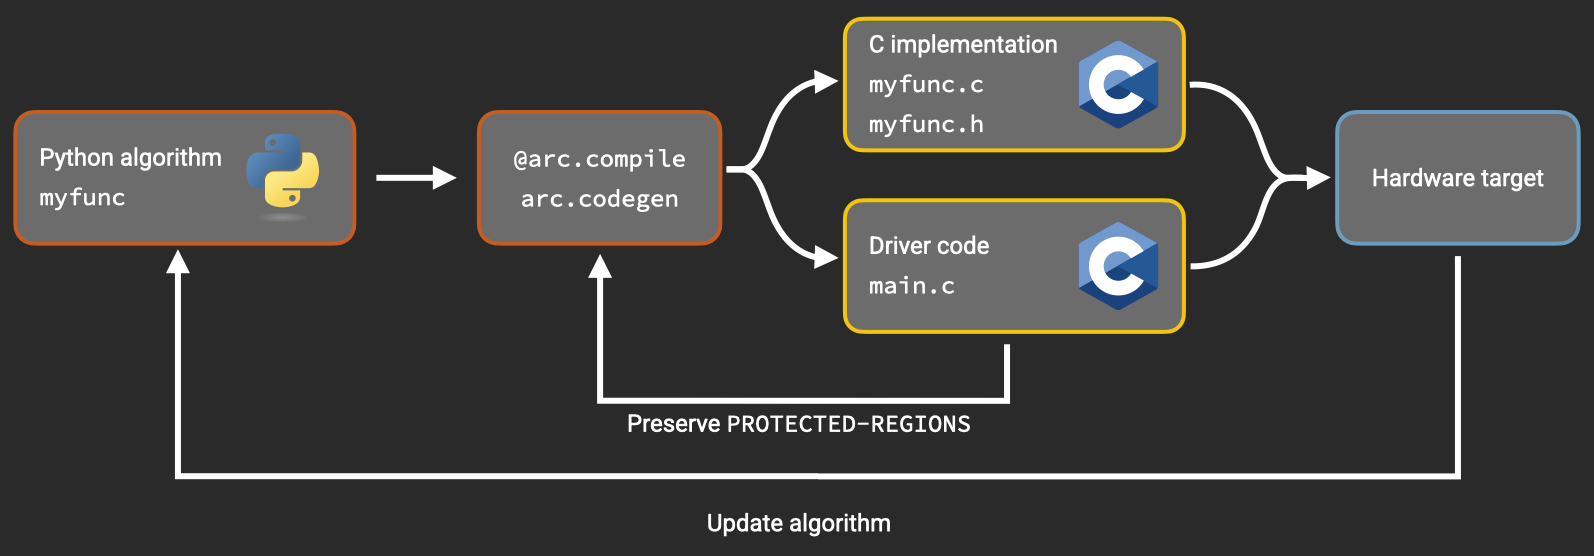
Instead, the workflow in Archimedes is to develop your algorithms in Python, test them in simulation, then automatically translate them to efficient C implementations that are ready for deployment. The goal is to combine rapid Python development with the efficiency and determinism of compiled C code. This avoids both the performance limitations of education-oriented tools for running Python directly on microcontrollers and the labor-intensive process of manual Python-to-C translation.
Tutorial overview
In this tutorial, we will walk through a simple example of this process. We will develop an IIR filter using SciPy’s signal processing tools and generate code for deployment to an Arduino. Although this is a simplified example, it illustrates the key steps of the Archimedes hardware deployment model.
The core workflow involves four pieces of code:
An Archimedes-compatible Python function (written by you)
The embedded C application (written by you)
A low-level C “kernel” implementation of the same function (generated automatically)
An “interface” layer providing a consistent and easy-to-use API for the kernel code.
We’ll get into the details later on. For now, the key idea is that only the C code gets deployed to the target hardware, but you can modify the Python code to quickly make changes that automatically propagate to the C source code. This unlocks streamlined workflows for quickly moving from modeling, simulation, and analysis to deployment and testing.
This tutorial contains three parts:
-
Overview of the full workflow
Basic usage of the auto-generated API
Minimal C application example
-
Converting Python functions to optimized C code
Characteristics of the generated “kernel” code
The CasADi API for generated C code
-
Creating boilerplate code for calling generated C code
Preserving modifications within protected regions
Customizing generated code with the templating system
Prerequisites
To follow this tutorial, you’ll need:
Basic familiarity with Python and NumPy
A Python environment with Archimedes installed
Understanding of C programming fundamentals
(Optional) An Arduino board and the Arduino IDE
No prior experience with CasADi or code generation is required.
Before we get started, one last comment: the full “path to hardware” includes not only code generation, but data acquisition and hardware-in-the-loop (HIL) testing workflows. These are central to the development roadmap - stay tuned for more on those capabilities soon.